
Filing a roof insurance claim after a storm in Springfield or Nixa can feel confusing, especially if you have never done it before. The good news is that the process follows a clear order, and knowing that order ahead of time puts you in a much stronger position. This post walks through every step from documenting damage to getting the work done, and explains what your roofer can and cannot do along the way.
TL;DR: Document damage within 24 to 48 hours, call your insurance company yourself to open the claim, and get a local roofer to help during the adjuster visit. Delayed reporting and missing photos are the top reasons claims get denied. Your roofer is an advocate and an assistant. Only the adjuster approves or denies your claim.
You walked into your living room this morning and noticed a brown stain spreading across the ceiling. It rained hard last night, and now you are wondering if that hailstorm last week actually did more damage than you realized. You have homeowners insurance, but you have never filed a roof claim before. You are not sure who to call first, what to photograph, or what happens if you do something wrong and the claim gets denied.
That feeling is completely normal. Filing a roof claim for the first time is stressful, mostly because nobody explains the process until you are already in the middle of it.
This guide walks you through all eight steps in plain language. By the end, you will know exactly who does what, which mistakes sink claims before they start, and how a local roofer fits into the picture.
Does Homeowners Insurance Cover Roof Damage?
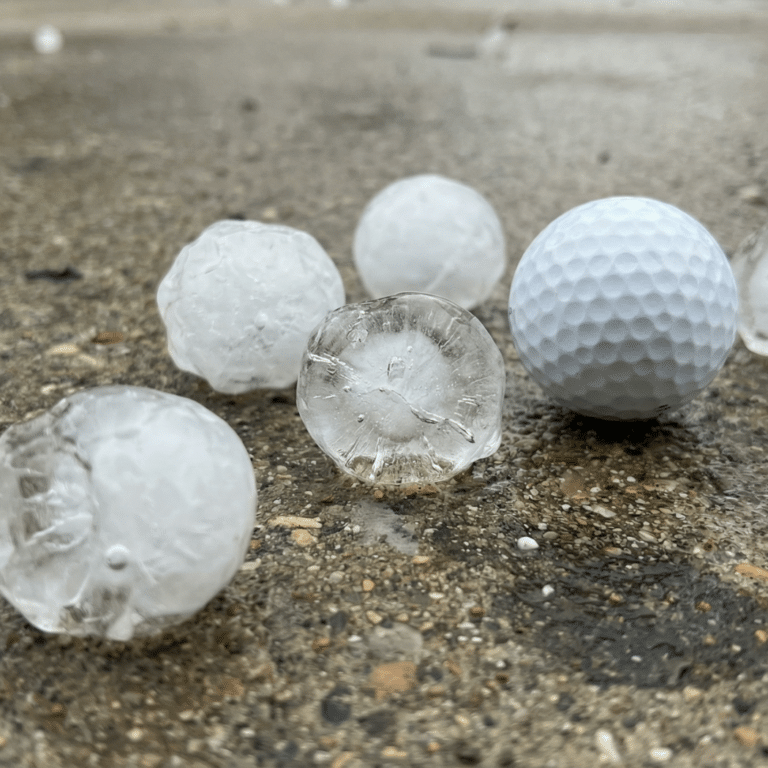
Most standard homeowners policies cover sudden storm damage. That includes hail, wind, lightning, and debris from a storm. If a hailstorm came through Springfield last Tuesday and cracked your shingles, that is the kind of event most policies are written to cover.
What policies do not cover is just as important to understand. Normal aging, wear and tear, and damage from years of deferred maintenance are not covered events. If your roof was already in rough shape and a storm pushed it over the edge, the insurer may argue the damage was partly pre-existing.
Some policies also include cosmetic damage exclusions. This means that if hail dented your metal vents or left marks on your shingles but did not cause a leak, the insurer may decline to pay for those repairs. Pull out your policy and look for the sections labeled “covered perils” and “exclusions” before you do anything else. Those two sections tell you almost everything you need to know about what your policy will and will not pay for.
Pro tip: Call your agent before you file. Ask directly: “Is sudden storm roof damage covered under my current policy?” Get the answer in writing or by email so you have it on record.
Step 1: Document Every Bit of Damage Right Away
Insurance companies need to see proof that your damage is storm-related, not something that was already there before the storm hit. The faster you document, the stronger that proof becomes.
Act within 24 to 48 hours of the storm. Weather changes, debris blows away, and conditions shift quickly. Photos taken the morning after a hail event look very different from photos taken two weeks later.
Here is what to capture:
- Photographs of the full roof from all four sides, taken from ground level
- Close-up shots of dented gutters, vents, AC units, and downspouts
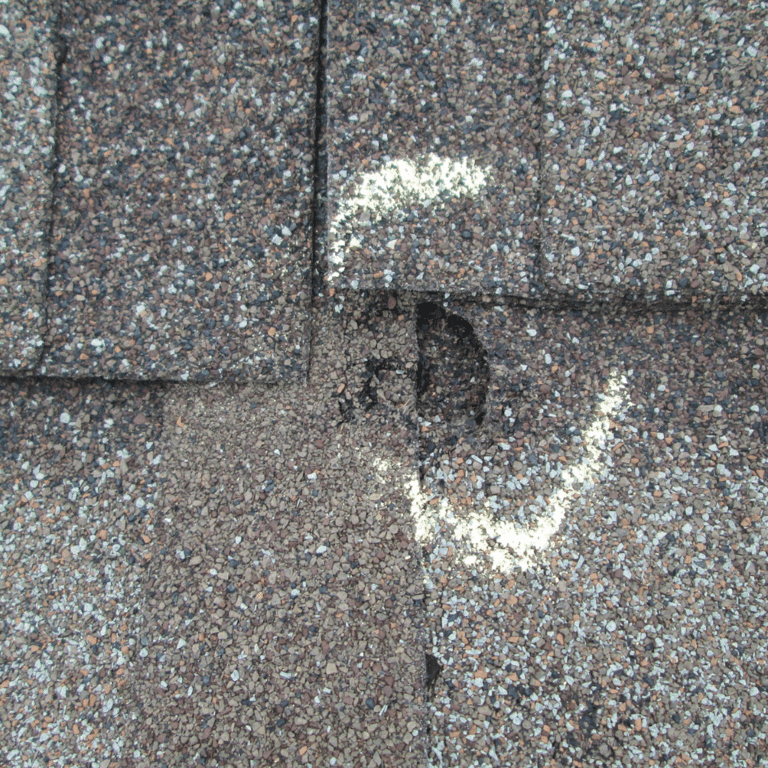
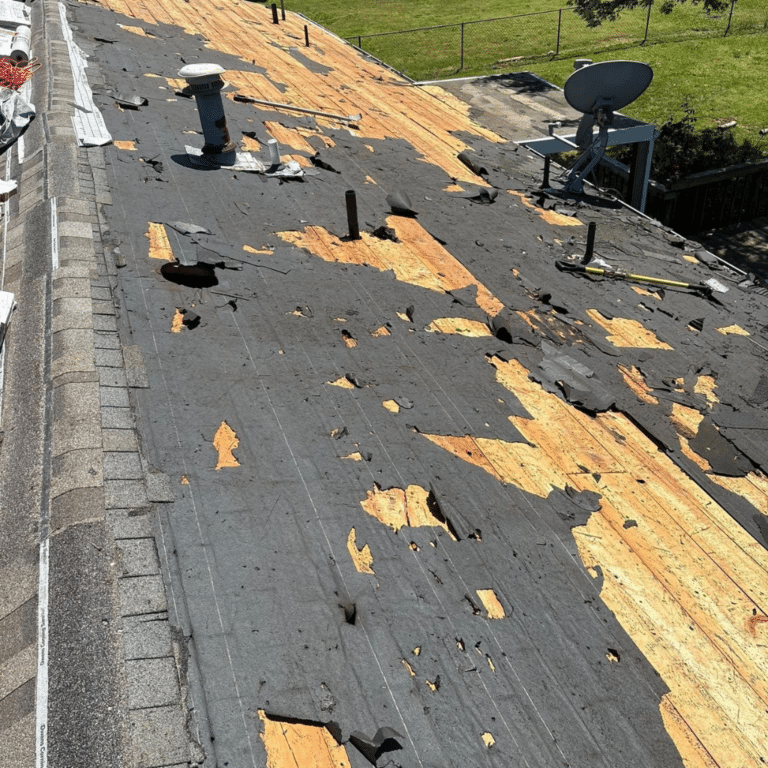
- Any missing, cracked, or lifted shingles
- Granules collecting in gutters or downspouts (granule loss looks like coarse, dark sand)
- Any interior ceiling stains or water intrusion
- Date and time stamps on every photo
Pro tip: Photograph your neighbor’s undamaged car or yard in the same frame if you can. This helps establish that the storm was real and local, not evidence of gradual wear and tear.
Step 2: Call Your Insurance Company Before Your Roofer
Most policies require homeowners to report damage promptly. Waiting too long is one of the most common reasons roof insurance claims get denied. Your insurer needs to know about the event before too much time passes.
Call your insurance agent or the claims line directly. Report the date of the storm, the type of weather event, and what visible damage you have observed. The person on the phone will open a claim and give you a claim number. Write that number down. You will use it every time you speak to anyone at the insurance company from this point forward.
According to NOAA, Missouri has experienced 120 billion-dollar weather and climate disasters between 1980 and 2024, with 82 of those being severe storm events involving hail and high winds. Southwest Missouri sees more tornadoes than any other part of the state, and the NWS Springfield forecast area averages about 10 tornadoes per year. Insurers operating in this region are familiar with storm claims, which is exactly why prompt reporting matters.
Pro tip: Do not let a roofer file the claim on your behalf. You are the policyholder. The claim is yours to file. A contractor can assist you, but they should not be the one calling your insurance company.
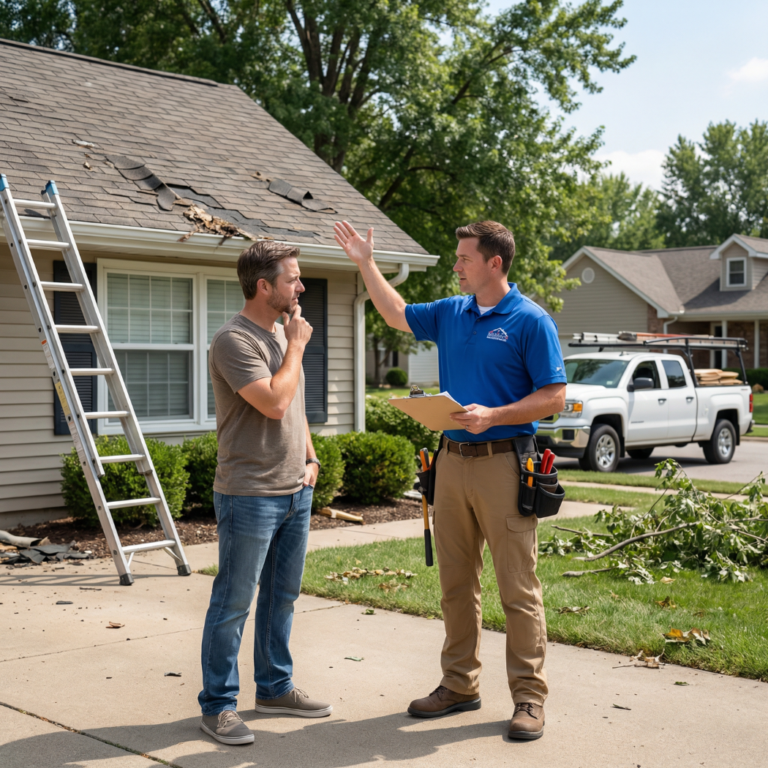
Step 3: Get a Local Roofer to Inspect Before the Adjuster Arrives
Once your claim is open, call a local, insured roofing company and schedule an inspection before the insurance adjuster visits your property. This gives you an independent set of eyes and a written record before the insurance company’s representative arrives.
A good roofer will document their findings in detail: photos, measurements, written notes about each area of damage, and their professional assessment of what the storm caused versus what was already present. That report becomes your evidence if the adjuster misses something or disputes a line item.
Having your roofer present during the adjuster visit also helps ensure nothing gets overlooked. They can point out damage that is easy to miss from a casual walkthrough, like subtle impact marks on the surface of shingles that only show up at certain angles. ProNail Exteriors offers free roof inspections and full insurance claim assistance in Springfield, Nixa, Ozark, and throughout Southwest Missouri.
Pro tip: Ask your roofer to give you everything in writing before the adjuster arrives. A verbal summary is not enough. You want a printed or digital document you can hand to the adjuster directly.
Step 4: Meet the Insurance Adjuster
The insurance company will schedule an adjuster to come out and inspect the damage. The adjuster reviews what they find, compares it to your policy, and decides what is covered and what is not. They are the decision-maker in this process.
Your roofer can be on-site during this visit. They can walk the roof with the adjuster, point out specific areas of damage, and share their written findings. What they cannot do is approve coverage or change the adjuster’s determination. The role of your roofer here is advocate and documentation support, not decision-maker.
Come to this meeting prepared. Bring your photos, your roofer’s inspection report, and the storm date. The more organized you are, the smoother the visit goes.
The table below shows exactly who does what throughout the claims process.
| Role | What They Do | What They Cannot Do |
|---|---|---|
| Homeowner | Files claim, provides documentation | Approve or deny coverage |
| Roofer | Inspects damage, assists the adjuster | File the claim or approve payment |
| Insurance Adjuster | Reviews damage, approves or denies | Perform the repair work |
| Insurance Company | Pays approved claims | Inspect the roof themselves |
Pro tip: If the adjuster wraps up quickly and your roofer’s report shows damage the adjuster did not mention, speak up politely and show your documentation before they leave. Requesting a second look on the spot is easier than requesting a re-inspection after the fact.
Step 5: Review the Adjuster’s Report Carefully
After the visit, the adjuster sends a written report that outlines what is covered, what is excluded, and what the payout will be. Read it carefully before you do anything else.
Compare the adjuster’s findings to your roofer’s inspection report line by line. Do the two documents describe the same damage? Are there items your roofer noted that the adjuster did not include? If the scope looks incomplete, you have options. You can request a re-inspection through your insurance company, or you can hire a public adjuster to independently review the claim. A public adjuster is a licensed professional who works on behalf of homeowners, not insurance companies. They charge a percentage of the final settlement if they help recover additional funds.
For questions about your rights as a homeowner during the claims process, the Missouri Department of Insurance handles consumer complaints and can explain your options if you believe a claim was handled unfairly.
Pro tip: Do not sign off on a payout or accept a settlement check until you are fully satisfied that the scope of work in the adjuster’s report matches the actual damage on your roof.
Step 6: Watch Out for These Claim Denial Reasons
Most roof insurance claim denials come down to a handful of predictable problems. Knowing them ahead of time means you can avoid most of them before they happen.
The most common reasons claims get denied:
- Delayed reporting. You waited too long to call after the storm, and the insurer argues the damage could have gotten worse in the meantime.
- Pre-existing damage. The adjuster finds evidence the damage was already there before the storm hit.
- Wear and tear. The insurer argues the roof aged out naturally rather than being storm-damaged.
- Lack of maintenance. Missing or deteriorated shingles that were not caused by the storm give the insurer grounds to reduce or deny the claim.
- Insufficient documentation. Not enough photos, no dates, or no inspection report to support the claim.
- Missed policy deadlines. Your policy had a filing window that passed before you reported the damage.
- Cosmetic-only damage. Your policy excludes dents or surface marks that do not cause leaks or functional damage.
The table below shows how to get ahead of each one before storm season arrives.
| Denial Reason | How to Avoid It |
|---|---|
| Delayed reporting | Call your insurer within 24-48 hours of any storm |
| Pre-existing damage | Annual inspections create a before-and-after record |
| Insufficient documentation | Photograph from ground level within hours of the storm |
| Cosmetic exclusions | Read your policy before storm season starts |
| Missed deadlines | Know your policy’s filing window now, not after a storm |
Pro tip: Annual roof inspections from a local, insured roofing company create a paper trail that shows your roof was in good condition before the storm. That record is valuable if an adjuster tries to argue the damage was pre-existing. You can learn more about what a professional roof inspection covers on our roof repair page.
Step 7: Choose Your Contractor and Schedule the Work
Once the claim is approved, you choose the contractor. Your insurance company cannot require you to use a specific company or a company from their preferred vendor list. The choice is yours.
Get at least two to three written estimates from local, insured companies. Compare the scope of work, materials, labor warranties, and whether the estimate includes permit costs. In Springfield, a building permit is required before any reroofing work begins. The ICC building codes that Springfield follows include inspection requirements for permitted roofing work. A contractor who skips the permit is cutting a corner that could affect your warranty and your coverage down the road.
Missouri does not have a statewide general contractor license, so look for contractors who are insured, use in-house crews, and can show you both a general liability certificate and a workers compensation certificate before they start. Never pay the full amount upfront. A small deposit is standard. Final payment comes after the work is complete and you have inspected it yourself. For a full overview of the roof replacement process, visit our roof replacement page.
Pro tip: Your contractor’s scope of work should match or exceed what the adjuster approved. If a contractor wants to do less than the adjuster outlined, ask for a specific explanation before agreeing to anything.
Step 8: Final Inspection and Closing the Claim
When the work is done, walk the property with the contractor before you sign off. Look for a few key things: all debris removed from the roof and yard, all penetrations (vents, chimneys, pipes, skylights) properly flashed with metal pieces that seal openings so water cannot sneak in, and no old shingles left behind in the yard or gutters.
Once you are satisfied with the work, make the final payment and notify your insurance company that the project is complete. If your policy includes recoverable depreciation, this is when you submit your final invoice to receive that held-back amount. Your insurer releases it after they confirm the work was completed.
Keep every document related to this claim in one folder: permits, inspection reports, the adjuster’s report, your contractor’s estimate, the warranty documents, and your final payment receipt. Those records are useful for your next claim, your next roof inspection, and when you eventually sell the home.
Pro tip: If anything about the final product does not look right, address it before the contractor leaves. A warranty call six months later is harder to resolve than a conversation on the day of completion.
What ProNail Exteriors Does During Your Insurance Claim
ProNail Exteriors offers free roof inspections across Springfield, Nixa, Ozark, and all of Southwest Missouri. When you call after a storm, the team comes out, documents the damage in detail with photos and written findings, and gives you a clear picture of what the storm did before your adjuster ever sets foot on the property.
During the adjuster visit, ProNail Exteriors can be on-site to walk the roof, point out damage, and share their independent inspection report. This kind of side-by-side comparison often catches items that get missed in a standard adjuster walkthrough. For a full look at everything ProNail Exteriors offers, visit our full services page.
ProNail Exteriors does not promise specific claim outcomes and does not cover deductibles. What they do is help you understand the process, document the damage thoroughly, and make sure the work gets done right the first time.
Pro tip: Having a local, trusted roofing company in your corner during the adjuster visit is one of the most practical things you can do to protect your claim. It costs nothing and often makes a real difference in the scope that gets approved.
FAQs About the Roof Insurance Claim Process
For more answers to roofing questions, visit our FAQs page.
Q: How do I know if my roof damage is covered by insurance?
Most standard homeowners policies cover sudden storm damage from hail, wind, and falling debris. They do not cover normal aging or damage from deferred maintenance. Read your policy’s “covered perils” section or call your agent directly and ask what your current policy covers for storm roof damage.
Q: Should I call my roofer or insurance company first?
Call your insurance company first to report the storm and open the claim. Then call a local, insured roofer to inspect the damage before the adjuster arrives. Having both your own documentation and a professional inspection report before that adjuster visit is the strongest position you can be in.
Q: How long do I have to file a roof insurance claim in Missouri?
Most policies require prompt reporting, but exact deadlines vary by company. Some require notice within 30 to 60 days of a storm event. Read your policy or call your agent right away so you know your specific filing window. Do not assume you have more time than you do.
Q: Can my roofer file the insurance claim for me?
Your roofer can help you document damage and can be present during the adjuster visit to answer technical questions. But the claim itself must be filed by you as the policyholder. If a contractor offers to take over your claim or asks you to sign over your claim rights, treat that as a warning sign.
Q: What if the adjuster misses damage my roofer found?
Show the adjuster your roofer’s written inspection report and photos on the spot. If items are still excluded after that conversation, you can request a re-inspection through your insurance company or hire a public adjuster to review the claim independently. Do not accept the payout until the scope matches the actual damage.
Q: What is a public adjuster and do I need one?
A public adjuster is a licensed professional who reviews insurance claims on behalf of homeowners rather than insurance companies. They can be helpful if your claim was denied or if the approved amount seems significantly lower than the actual repair scope. They typically charge a percentage of the final settlement amount.
Q: Does filing a roof insurance claim raise my rates?
It depends on your insurer and your claims history. Some companies increase premiums after a weather-related claim, and others treat storm claims differently than other claim types. Talk to your agent before filing if this is a concern you want to address upfront.
Q: Does Springfield require a permit for insurance roof replacement?
Yes. Springfield requires a building permit for roof replacements, including those being done through an insurance claim. Your contractor is responsible for pulling that permit before work begins. If any contractor tells you a permit is not necessary for a reroof, that is a red flag worth taking seriously.
Q: What is recoverable depreciation on a roof claim?
When an insurer pays a claim, they sometimes withhold a portion of the payout called recoverable depreciation. This amount is held back until the work is completed and you submit the final invoice showing the actual cost. Once you do that, the insurer releases the withheld amount. Ask your agent whether your specific policy includes recoverable depreciation before the work begins.
Q: What should I do if my roof insurance claim is denied?
Get the denial in writing and read the specific reason carefully. Then compare it to your documentation and your roofer’s inspection report. You can request a re-inspection, file a complaint with the Missouri Department of Insurance, or consult a public adjuster or an attorney. A denial is not always the final word.
Key Takeaways
Document quickly
- Photos within 24 to 48 hours are your strongest evidence.
- Capture all four sides of the roof, gutters, vents, AC units, and any interior stains.
File the claim yourself
- Delayed reporting is the top reason roof claims get denied.
- Call your insurer first, get a claim number, and keep it handy.
Use your roofer as an advocate
- A local roofer’s pre-adjuster inspection creates an independent record.
- Only the adjuster approves or denies coverage. Your roofer is there to assist.
Know the denial traps
- Pre-existing damage, wear and tear, late reporting, and insufficient photos are the most common claim killers.
- Annual roof inspections create a maintenance record that protects you.
Handle the back end carefully
- Review the adjuster’s report against your roofer’s findings before accepting any payout.
- Permits are required in Springfield and Nixa for roof replacements.
- Keep every document related to the claim for the life of the roof.
Need Help Navigating a Roof Insurance Claim in Springfield?
ProNail Exteriors serves Springfield, Nixa, Ozark, and all of Southwest Missouri. They offer free roof inspections and walk homeowners through the insurance process step by step, with no pressure and no surprises. Whether your roof is clearly damaged or you just want to know what it looks like before storm season hits full swing, the inspection is free and the conversation is always honest.
Schedule your free inspection today or call 844-321-6245 and get ahead of the next storm before it gets ahead of you.
ProNail Exteriors | Roofing, Siding, Windows, Gutters, Decks, and More | Serving Southwest Missouri Since 2025